WordPress powers almost 43% of all websites, but not all are in English. The number of non-English websites is rising, with 56% of WordPress sites being created in languages other than U.S. English. This shows a massive opportunity for going multilingual and translating your site into multiple languages.
However, getting started can be confusing, even for experienced WordPress users. You might be wondering about the best WordPress multilingual plugins. What are the technical challenges of setting up a multilingual website? Are there any SEO implications? Should you use machine or human translations?
So let’s dive in and learn how to translate your WordPress website and reach a wider audience.
Why Translate a WordPress Website?
Translating your WordPress website offers numerous advantages, such as expanding your global reach by providing content in multiple languages. This, in turn, attracts international traffic and engages users who prefer browsing in their native language. This enhancement in user experience can lead to longer browsing sessions and increased engagement. Let’s check the explanation details.
Expanding Your Global Reach
Expanding your global reach is one of the key reasons for translating your WordPress website. With the internet connecting people worldwide, having a website that caters to different languages is essential to reach a wider audience.
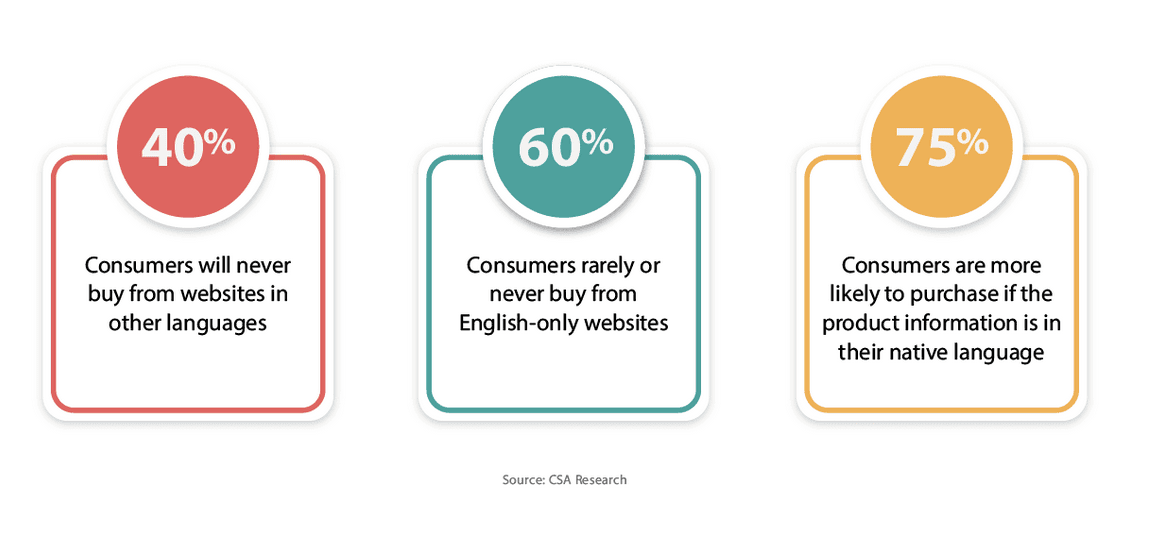
Billions of internet users speak different languages, and by translating your website, you can make your content accessible to them. A language switcher is a valuable tool that allows visitors to switch between different languages on your website easily.
By providing content in multiple languages, you can attract international visitors, increase your website’s visibility, and grow your global online presence. So make sure to expand your website’s potential; consider translating it to reach a wider audience.
Enhancing User Experience with Multilingual Content
One of the main benefits of translating your WordPress website is enhancing user experience. When visitors can access content in their native language, it creates a more personalized and engaging experience.
A multilingual website allows users to navigate through your content easily and understand it without any language barriers. This can lead to increased time spent on your website, higher engagement, and a greater chance of conversion.
Translating your WordPress website is a great way to improve the user experience and cater to a global audience.
Preparing to Translate Your WordPress Website
Before diving into the translation process, it’s essential to prepare your WordPress website for translation. This involves considering your target audience, navigating the WordPress dashboard, and determining your website’s default language.
After preparing these steps, you’ll be ready to start translating your WordPress website and reaching a wider audience.
Identifying Your Target Audience and Languages
Identifying your target audience and the languages they speak is crucial when translating your WordPress website. This will help you prioritize which languages to translate your content into and ensure you’re targeting the right audience.
Start by analyzing your website’s analytics and identifying the countries you receive the most traffic. This will give you insight into the languages that your visitors prefer.
You can also conduct market research to identify potential markets and languages that align with your business goals. Consider factors such as the market size, competition, and growth potential.
When translating your WordPress website, you can make informed decisions about which languages to prioritize. This will ensure that you provide content that resonates with your audience and improves their overall user experience.
Evaluating Your Website’s Translation Readiness
Before starting the translation process, it’s important to evaluate your website’s translation readiness. This involves assessing the tools and resources available to you and the ease of translating your content.
First, consider the translation editor available in your WordPress theme or plugin. This will determine how user-friendly and efficient the translation process will be.
Next, evaluate your WordPress theme to ensure that it supports multilingual functionality. Some themes may have built-in features that simplify translation, while others may require additional plugins or customization.
Lastly, consider the overall ease of use. Translating your website should be straightforward and not require extensive technical knowledge or coding skills.
How to Create a Multilingual Website in WordPress
First, you must choose the right translation plugin for your needs. Many WordPress plugins offer automatic translation and a built-in translation editor. In this tutorial, we use Linguise, a WordPress AI translation plugin that provides multiple languages, powered by Google Cloud AI, capable of translating all elements of your WordPress, and is easy to set up. For complete steps, continue reading the following explanation.
Step 1: Register Linguise Account
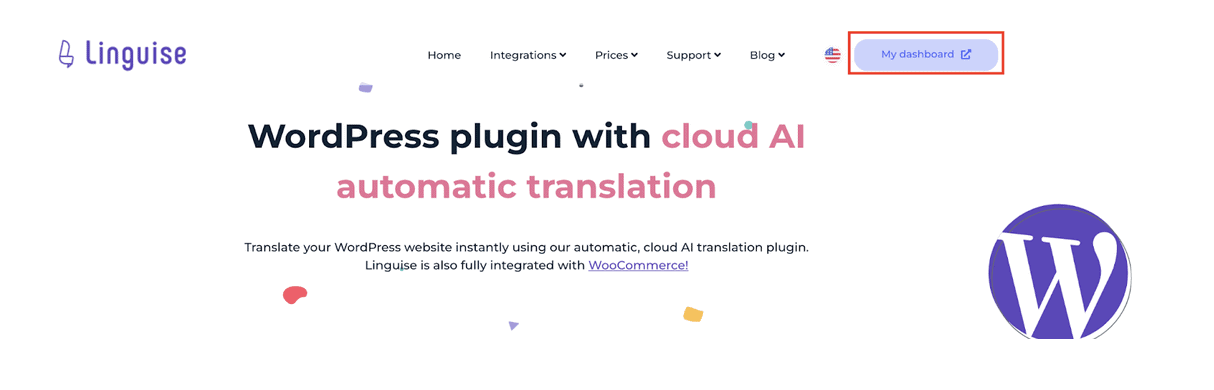
To get started, register for a Linguise account by entering your name and email and creating an account. Once you have completed the registration process, you will be given access to the Linguise dashboard. From there, you must include your site domain and provide the necessary details to complete the setup process.
- For the Account section, enter your Linguise account credentials.
- Enter your website URL.
- In the Platform/CMS category, select WordPress.
- Select the primary language for your website in the Language section.
- Indicate the languages you want to add for translation in the Translation Languages segment.
- Enable the Translate URL option.
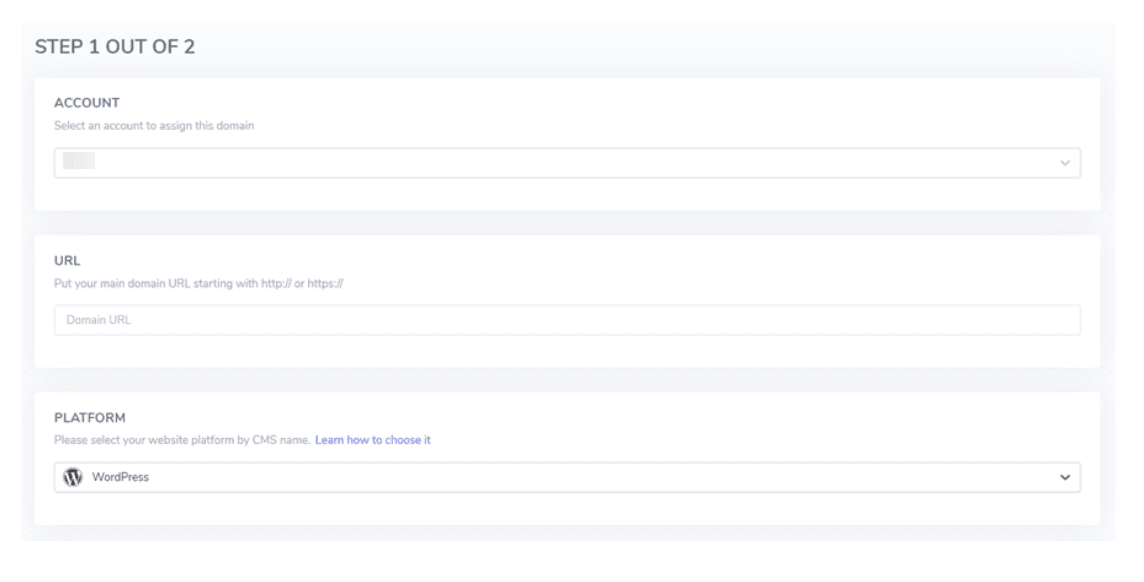
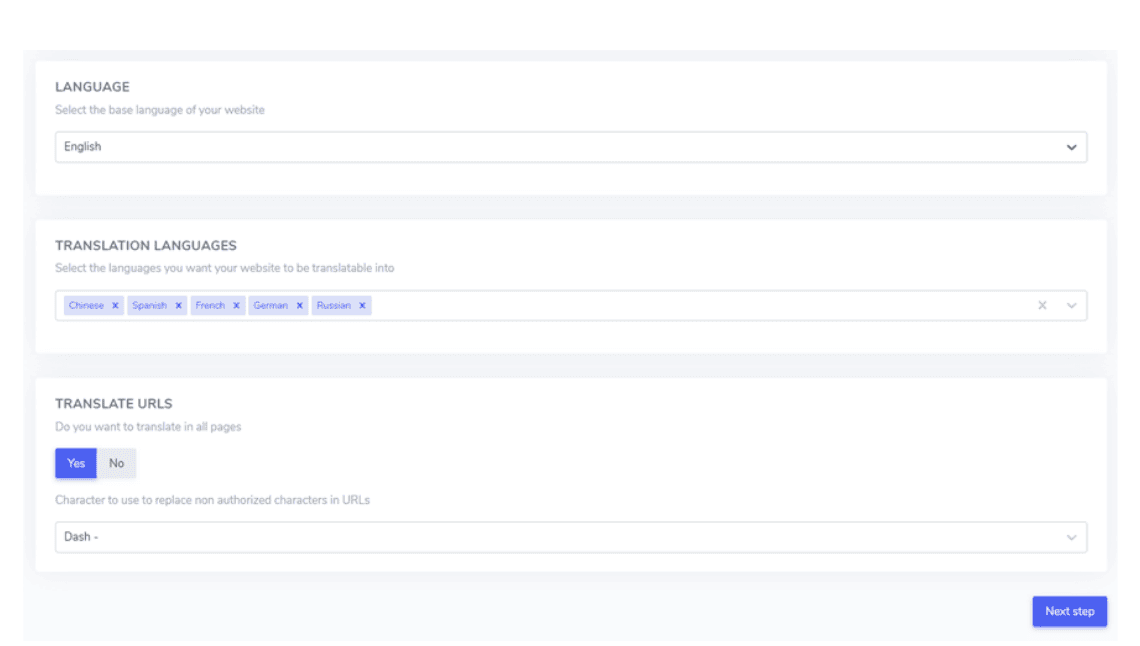
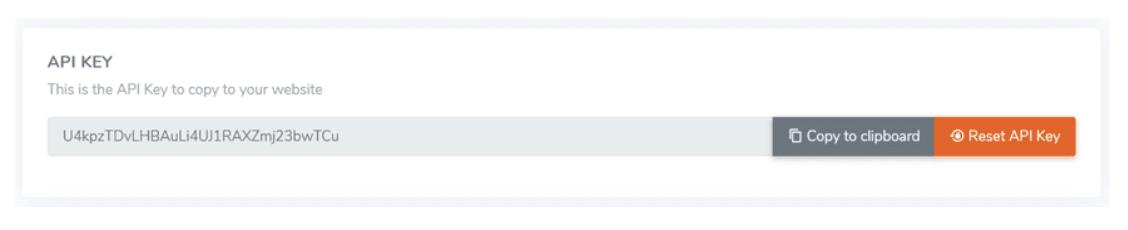
Then, click Next Step to move to the next page. On this page, you will find an API key that you will need to paste into WordPress later, so click Copy to clipboard.
Step 2: Install Linguise AI Plugin on WordPress
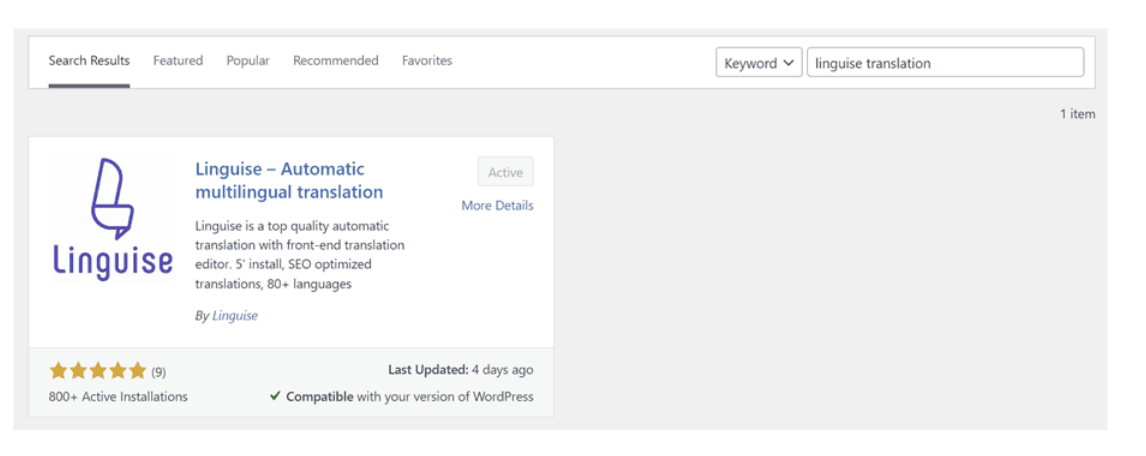
Switch to the WordPress dashboard if you have successfully registered and added a WordPress website domain. Here, you need to install the Linguise translation AI plugin.
How to open the Plugin menu > Add new > Search for Linguise > Install > Activate.
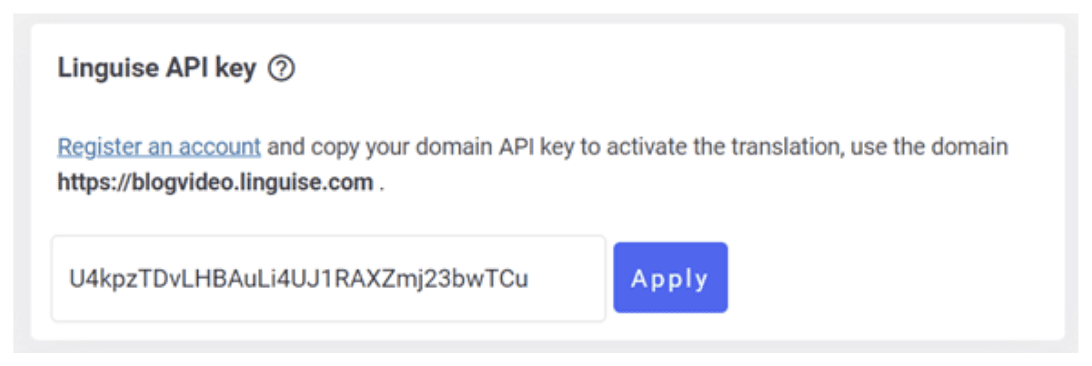
Step 3: Enabled API key
After the Linguise plugin is installed, open the Linguise menu in the left navigation bar. A display like the following will appear. In the Linguise API key column, paste the API key you got from the previous Linguise dashboard, then click Apply.
After enabling the API key, your website will automatically be integrated with Linguise and can be translated immediately. Then, the default language switcher display will appear.
Step 4: Customize language switcher
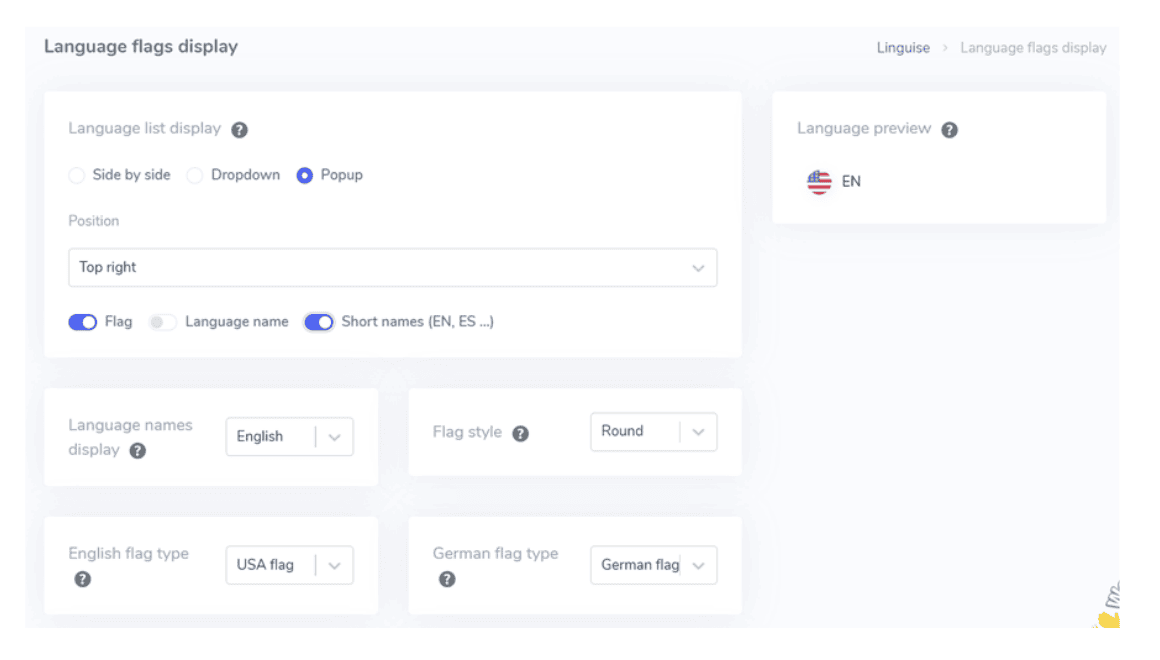
Customizing the language switch button is essential before translating your website. You can do this via the WordPress or Linguise dashboard by selecting Settings > Language flags display. On this page, you can customize the list of language displays, positions, icons, and flags, and names. You can choose to display flags and names, flags only, or names only, and select the flag style. As you make changes, you can preview them in real-time on the page.
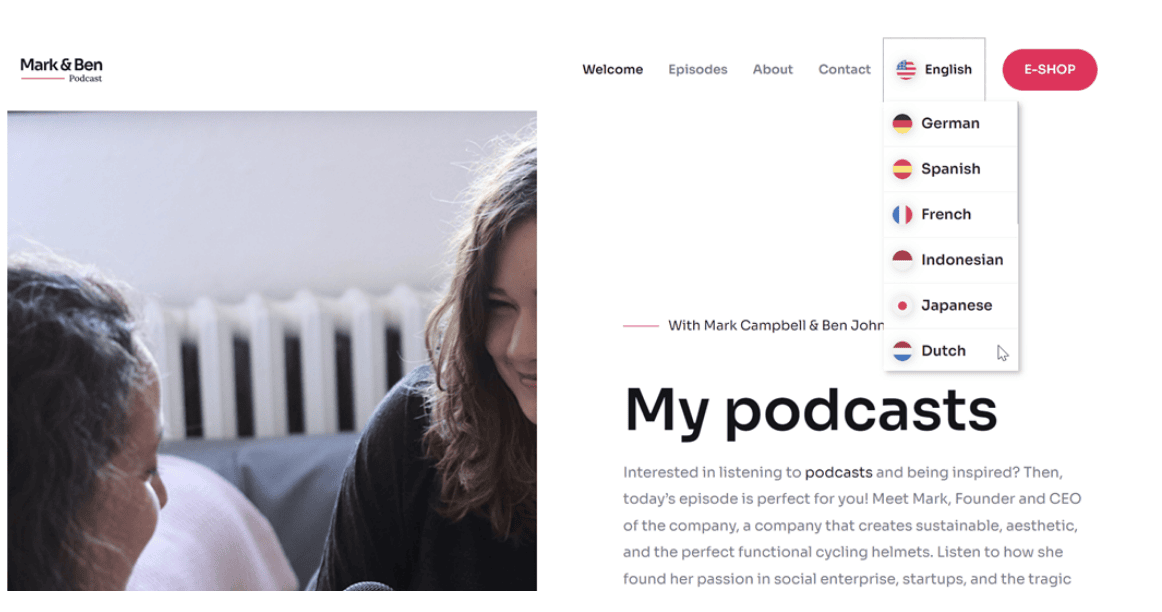
After the customization, it is time to see the results of the button on the website page. The image below is an example of what a language switcher looks like on a website.
Step 5: Try translating the website
Once the language switcher has been customized, it’s time to try the Linguise integration. Let’s translate this page from English to Japanese.

After selecting Japanese in the language switch button, all elements on the page, such as buttons and paragraphs, will be automatically translated in just a few seconds.

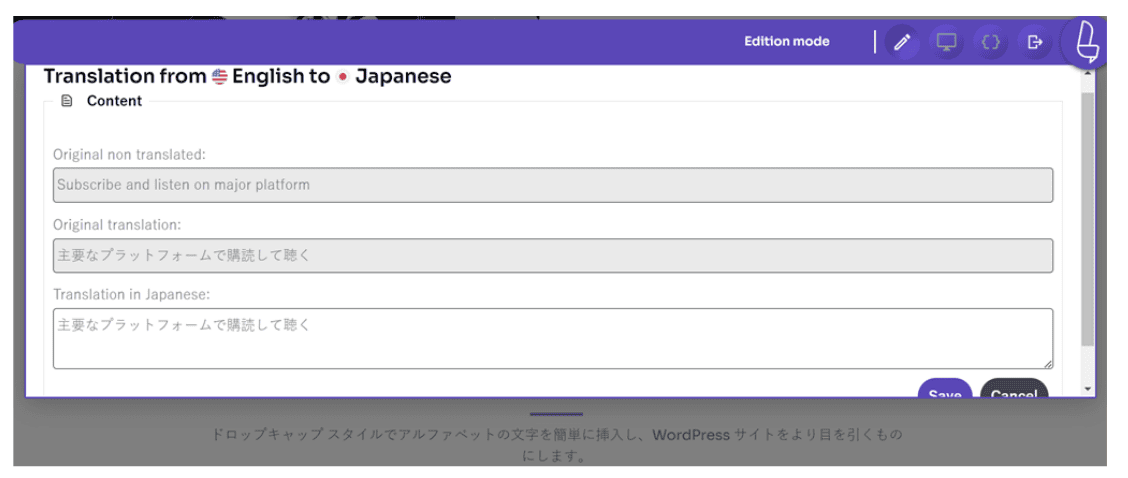
Step 6: Review the translation using a live editor
It can translate automatically, but the Linguise AI plugin can also translate manually via the live editor feature. This feature allows you to review the machine’s automatic translation results.
To do this, open the dashboard and select the Live Editor menu; you will then be asked to choose a language.
You can immediately choose which part to edit the translation results in. In the Translation in Japanese column, enter the Japanese translation you think is more appropriate. If so, click Save.
Best Practices for WordPress Website Translation
When translating your WordPress website, following best practices to ensure a smooth and consistent user experience is important. Here are some best practices to consider:
- Maintain Translation Consistency: Use the same translation style and terminology across all translated content to ensure consistency and coherence.
- Translate All Elements: Ensure that all elements of your website, including page content, widget text, and shortcodes, are translated to provide a fully localized experience.
By following these best practices, you can create a high-quality, user-friendly multilingual website that resonates with your audience and enhances their overall experience.
Maintaining Translation Consistency
Maintaining translation consistency is crucial when translating your WordPress website. Consistent translations help create a seamless user experience and build trust with your audience. Here are some tips for maintaining translation consistency:
- Use the same translation editor throughout the translation process. This ensures consistency in terminology and style.
- Set a default language for your website. This language will be displayed to users who prefer a language unavailable in the translated versions.
- Use consistent language names. Ensure that the language names in your language switcher and throughout your website are consistent to avoid confusion.
By maintaining translation consistency, you can create a cohesive and user-friendly multilingual website that provides a seamless experience for your audience.
Ensuring All Elements Are Translated
To provide a fully localized experience, it’s important to ensure that all elements of your WordPress website are translated. This includes not only the main page content but also widgets, shortcodes, and other elements. Here are some key elements to consider:
- Page Content: Translate all text within your pages, including headings, paragraphs, and captions.
- Widgets: Translate any text displayed within your widgets, such as contact forms or social media feeds.
- Shortcodes: If you have any shortcodes on your website, ensure that the content within the shortcodes is also translated.
By translating all elements of your website, you can provide a comprehensive and user-friendly experience for your multilingual audience.
Common Translation Challenges
Translating your WordPress website can come with its fair share of challenges. Here are some common challenges you may encounter and how to overcome them:
- Dealing with Translation Errors: Review and edit machine-translated content to ensure accuracy and quality.
- Managing Multilingual SEO: Optimize your translated content for SEO by conducting keyword research and using relevant keywords in your translations.
- Ensuring a Smooth Language Switcher: Test your language switcher to ensure it functions correctly and provides a seamless user experience.
By being aware of these challenges and implementing the necessary strategies, you can overcome them and create a successful multilingual website.
Dealing with Translation Errors
Translation errors can occur during the translation process, especially with machine translation. To deal with translation errors, it is essential to review and edit the translated text. Here are some tips to address translation errors:
- Review the translated text carefully. Compare it to the source text and ensure the meaning is accurately conveyed.
- Use the translation editor provided by your plugin to make edits and corrections. This allows you to maintain consistency and coherence throughout the translation.
- Seek feedback from native speakers or professional translators to identify and address any remaining errors or areas of improvement.
Addressing translation errors can ensure the accuracy and quality of the translated content and provide a better user experience for your website visitors.
Managing Multilingual SEO
Managing multilingual SEO is crucial to ensure that your translated content ranks well in search engines and attracts organic traffic. Here are some tips for managing multilingual SEO:
- Conduct keyword research for each language and incorporate relevant keywords in your translated content.
- Optimize your URL slugs to reflect the language of the content. This helps search engines understand the language and improves the visibility of your translated pages.
- Implement hreflang tags in your website’s code to indicate each page’s language and country targeting. This helps search engines understand the language and geographic targeting of your content.
With these multilingual SEO strategies, you can improve the visibility of your translated content and attract more organic traffic to your website.
Conclusion
Expanding your WordPress website’s reach globally and enhancing user experience can be achieved by translating your content into multiple languages. With the help of appropriate tools and resources, you can create multilingual content efficiently and reach a wider audience. It is essential to implement SEO strategies for each translated version and ensure quality assurance through testing. Balancing machine and human translation can yield the best results. Consistency and completeness in translation are crucial best practices to follow. Overcoming challenges such as errors and managing multilingual SEO will help to maintain a successful multilingual website. Keep these tips in mind for a smooth and effective translation process.