
Every music producer loves a good shortcut. And in FL Studio, custom template files are the ultimate shortcut. They save time. They reduce stress. They help you start creating instantly instead of setting things up over and over again.
TL;DR: Custom templates in FL Studio let you load your favorite sounds, routing, and plugins instantly. They eliminate repetitive setup and speed up your workflow. You can build different templates for different genres or tasks. Once created and saved properly, they become powerful creative launchpads.
Let’s break it down in a fun and simple way. No technical jargon overload. Just practical steps you can use today.
Why You Should Use Templates in FL Studio
Imagine opening FL Studio and everything is already ready.
- Drums loaded
- Mixing channels routed
- EQ and compression set
- Sidechain prepared
- Your favorite synths waiting
No clicking around. No rebuilding your usual setup. Just press play and start creating.
That’s the power of templates.
Templates help you:
- Save time
- Stay consistent
- Reduce decision fatigue
- Boost creativity
Less setup. More music.
What Is a Template in FL Studio?
A template is a pre-configured project file. It opens with:
- Preloaded instruments
- Pre-routed mixer tracks
- Preset effects
- Organized playlist layout
- Color coding
You’re basically building your dream starting point.
Think of it like meal prepping. You chop everything once. Then cooking becomes easy all week.
Step 1: Design Your Ideal Workflow
Before building anything, ask yourself:
- What genre do I produce?
- What plugins do I always use?
- How do I organize my tracks?
- What slows me down?
Your template should remove friction.
For example:
- EDM producer? Preload kick, clap, hi-hats, and sidechain routing.
- Hip-hop producer? Load drum rack, 808, piano, and vocal chain.
- Singer-songwriter? Add guitar input routing and vocal effects.
Templates are personal. There is no “perfect” one. Only what works for you.
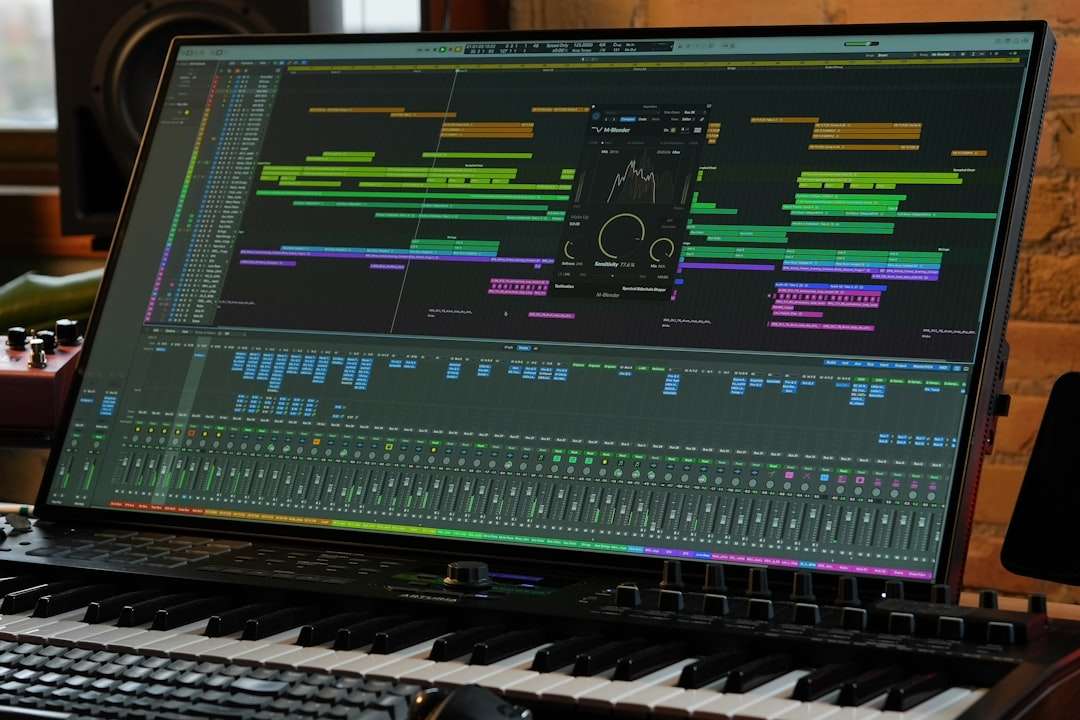
Step 2: Set Up Channel Rack Like a Pro
Start with your most-used sounds.
Add instruments to the Channel Rack:
- Kick
- Snare
- Hi-hat
- Bass
- Main synth
- Pad
Rename everything clearly.
Example:
- Kick Punchy
- Snare Tight
- Lead Wide
Color code them. Yes, this matters. Your brain loves visual organization.

Keep it clean. Future you will say thank you.
Step 3: Pre-Route Mixer Tracks
This is where the real time-saving happens.
Route each sound to its own mixer track.
Create mixer groups like:
- Drums Bus
- Bass Bus
- Music Bus
- Vocal Bus
- Master Effects
Now add basic processing you almost always use:
- EQ cutting lows
- Light compression
- Soft clipping on drums
- Limiter on master (temporary)
Do not overdo it.
This is a starting point. Not a finished mix.
Step 4: Add Send Tracks
Send tracks make mixing clean and efficient.
Create:
- Reverb send
- Delay send
- Parallel compression
- Saturation bus
Now you can quickly send sounds without adding 20 separate reverbs everywhere.
This keeps CPU usage low and your project organized.
Step 5: Organize the Playlist
The Playlist can get messy fast.
Fix that before problems begin.
Create sections:
- Intro
- Verse
- Chorus
- Drop
- Bridge
- Outro
Label empty pattern slots like:
- Drums
- Bassline
- Chords
- Lead
- FX
This removes guesswork when inspiration hits.
Step 6: Create Multiple Templates
You don’t need just one template.
Create different ones for different purposes:
1. Beat Making Template
- Drum kits ready
- 808 preloaded
- Basic mix chain
2. Recording Template
- Mic input routed
- Low latency setup
- Vocal chain ready
3. Mixing Template
- Group buses created
- Metering plugins loaded
- Reference track slot ready
4. Mastering Template
- EQ
- Compressor
- Limiter
- Stereo imaging
Different jobs. Different tools.
Template Type Comparison
| Template Type | Best For | Main Benefit | Complexity |
|---|---|---|---|
| Beat Making | Fast idea creation | Instant groove building | Low |
| Recording | Vocals and instruments | Clean signal chain ready | Medium |
| Mixing | Polishing tracks | Organized routing and buses | High |
| Mastering | Final polish | Consistent loudness control | High |
Step 7: Save Your Template the Right Way
This part is important.
To save your template:
- Click File
- Select Save as
- Navigate to the FL Studio Templates folder
- Save as .flp
Now it will appear when you create a new project.
Easy.
You can even organize templates into subfolders like:
- Hip Hop
- EDM
- Pop
- Client Work
Advanced Workflow Optimization Tips
1. Disable Unused Plugins
Heavy plugins slow down loading time. Keep templates lightweight.
2. Add a Reference Track Channel
Pre-route a mixer track for reference songs. Mute by default.
3. Add Markers for Arrangement
Structure speeds up creativity. Blank canvas can be intimidating.
4. Include Shortcuts Reminder
Add a small text note in the Playlist with key shortcuts.
5. Backup Your Templates
Store copies in cloud storage or an external drive.
Common Mistakes to Avoid
Let’s save you some pain.
- Overloading plugins – Keep it flexible.
- Too many sounds – Simplicity wins.
- No organization – Color and label everything.
- Never updating templates – Improve as your skills improve.
Your template should evolve with you.
How Templates Improve Creativity
This might sound strange.
But limits improve creativity.
When your tools are ready and limited, you focus on ideas. Not technical setup.
No distractions.
No endless browsing.
Just music.
Templates remove barriers between your brain and your speakers.
Build Once. Benefit Forever.
Creating a good template may take one hour.
Using it saves hundreds of hours.
That’s a good deal.
Professional producers rely heavily on templates. Not because they are lazy. But because they are smart.
Workflow is everything.
The faster you capture ideas, the more songs you finish.
Final Thoughts
Custom template files in FL Studio are not just a nice trick. They are a serious workflow upgrade.
Start simple.
Build one template today.
Refine it after every project.
Soon, opening FL Studio will feel different.
Faster.
Smoother.
More professional.
And most importantly, more fun.
Now go build your ultimate creative launchpad.